Install macOS Big Sur on a Newly Unsupported Mac With WI-FI Working: My iMac Late-2012

You are probably aware that this fall, like every single fall season, the pumpkin spice latte new macOS version will be available to install. However, this year, Apple chose to do things differently.
macOS Big Sur
First thing first, the version number. Yes, we are now looking at macOS 11, after roughly 20 years of macOS 10/Mac OS X incremental updates. Why change now? Well, with the release of this new version which will be available on Apple Silicon-based Macs and which introduces a totally new design, Apple taught it was time.
Weirdly (not really), I tend to agree with that. Indeed, I've now spent most of my life on version 10. That makes me think I still have the CD for Mac OS 9 somewhere and that I should take my first computer ever — the iMac G4 from 2000 — for a spin sometime... just for fun.
Yet, that is not the only thing Apple decided to innovate on: making perfectly working older Macs obsolete seems to be one of the new features brought by this version. Yikes.
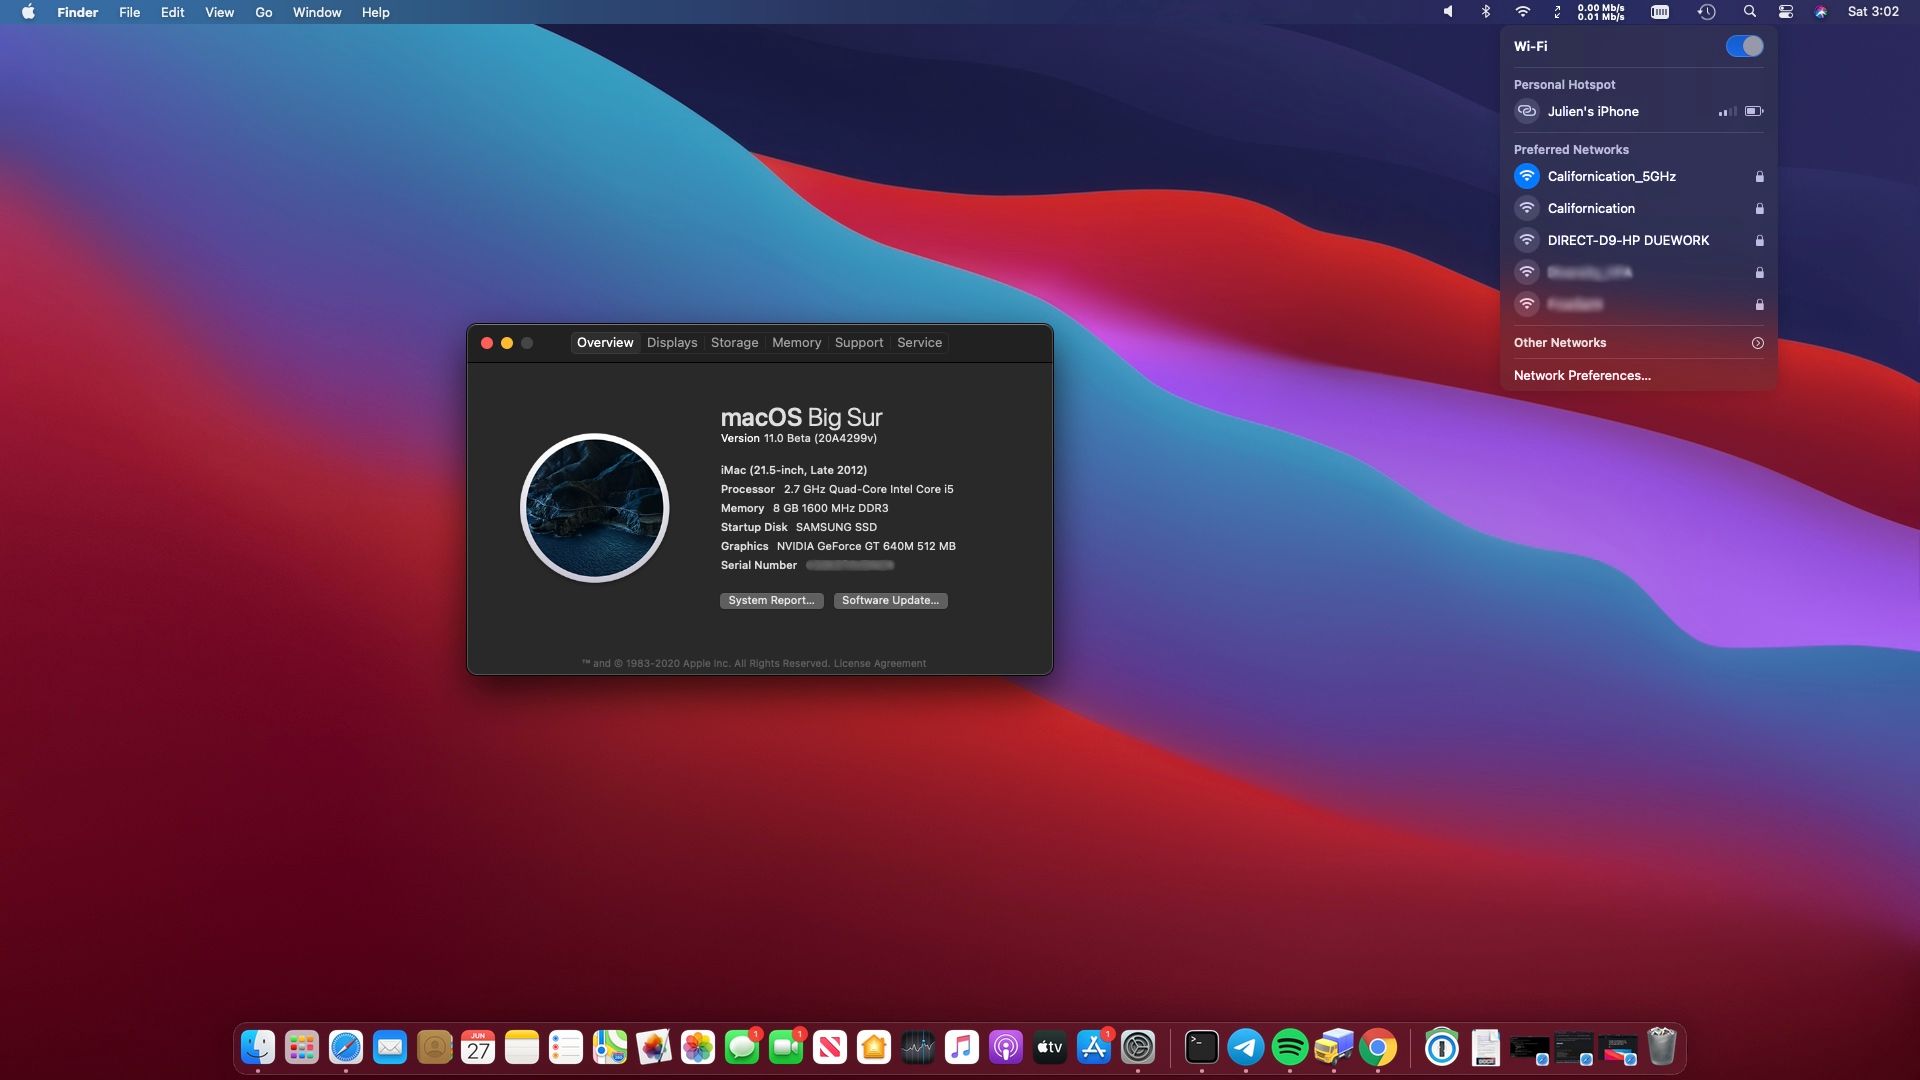
My iMac late-2012
I am actually writing this article on this iMac. Yup, that's an eight years old device still standing perfectly here — accounting for the external SSD I'm running macOS from. I can remember myself saving the money for it for years and then finally going to the store with my mother, picking an iMac from the aisle, buying Microsoft Office like a dumba-- with it and unboxing it at home... with no Internet connection whatsoever. Anyway.
The fact is, this machine has serious specs that are still relevant to this day. Indeed, my iMac is equiped with:
- an Intel Core i5 Quad-Core @ 2.7 GHz;
- 8GB of DDR3 RAM @ 1600 MHz;
- a 128GB external Samsung M.2 SSD connected via USB-3 with macOS installed on it;
- an NVIDIA GeForce GT 640M graphics card with 512MB of VRAM (yes, yes, NVIDIA graphics, in a Mac, what a world).
I was then rightfully persuaded while watching the WWDC20, with my specs in mind, that my Mac, will, once again receive this new version, as it did with macOS Catalina. But oh boi was I wrong... Several hours later, articles started to pop out of nowhere saying my iMac (in addition to my Apple Watch Series 2 and AirPods 1st-gen) was now obsolete and stuck on macOS Catalina.
Unacceptable (!), I taught. But then, I remembered that some people were running the current version on already obsolete machines. So I began to search... and was I reassured by the dozens of Mac-afficionados already running the macOS Big Sur beta1 on their unsupported MacBooks and Mac Minis.
The trick
Well then, with all those people already installing the beta on their unsupported Macs, I started to work on it for mine. Without spoiling you the ending, I was not expecting for it to work as well as it does (remember, I'm using it right now).
The basic principle of this "hack" is to disable the verification of the system done by the installer and ideally force the installation by disabling some security aspects of macOS and adding a new library in the process that will help us achieve our goal.
If you follow very simple instructions, the end of the installation is pretty straightforward: in fact you will in the end be doing the same thing you would have been if your Mac had been compatible to start with.
Those additional steps done, some reboots, and an hour elapsed... et voilà! You are now rocking the last version of macOS (still in beta, remember) on your obsolete system.
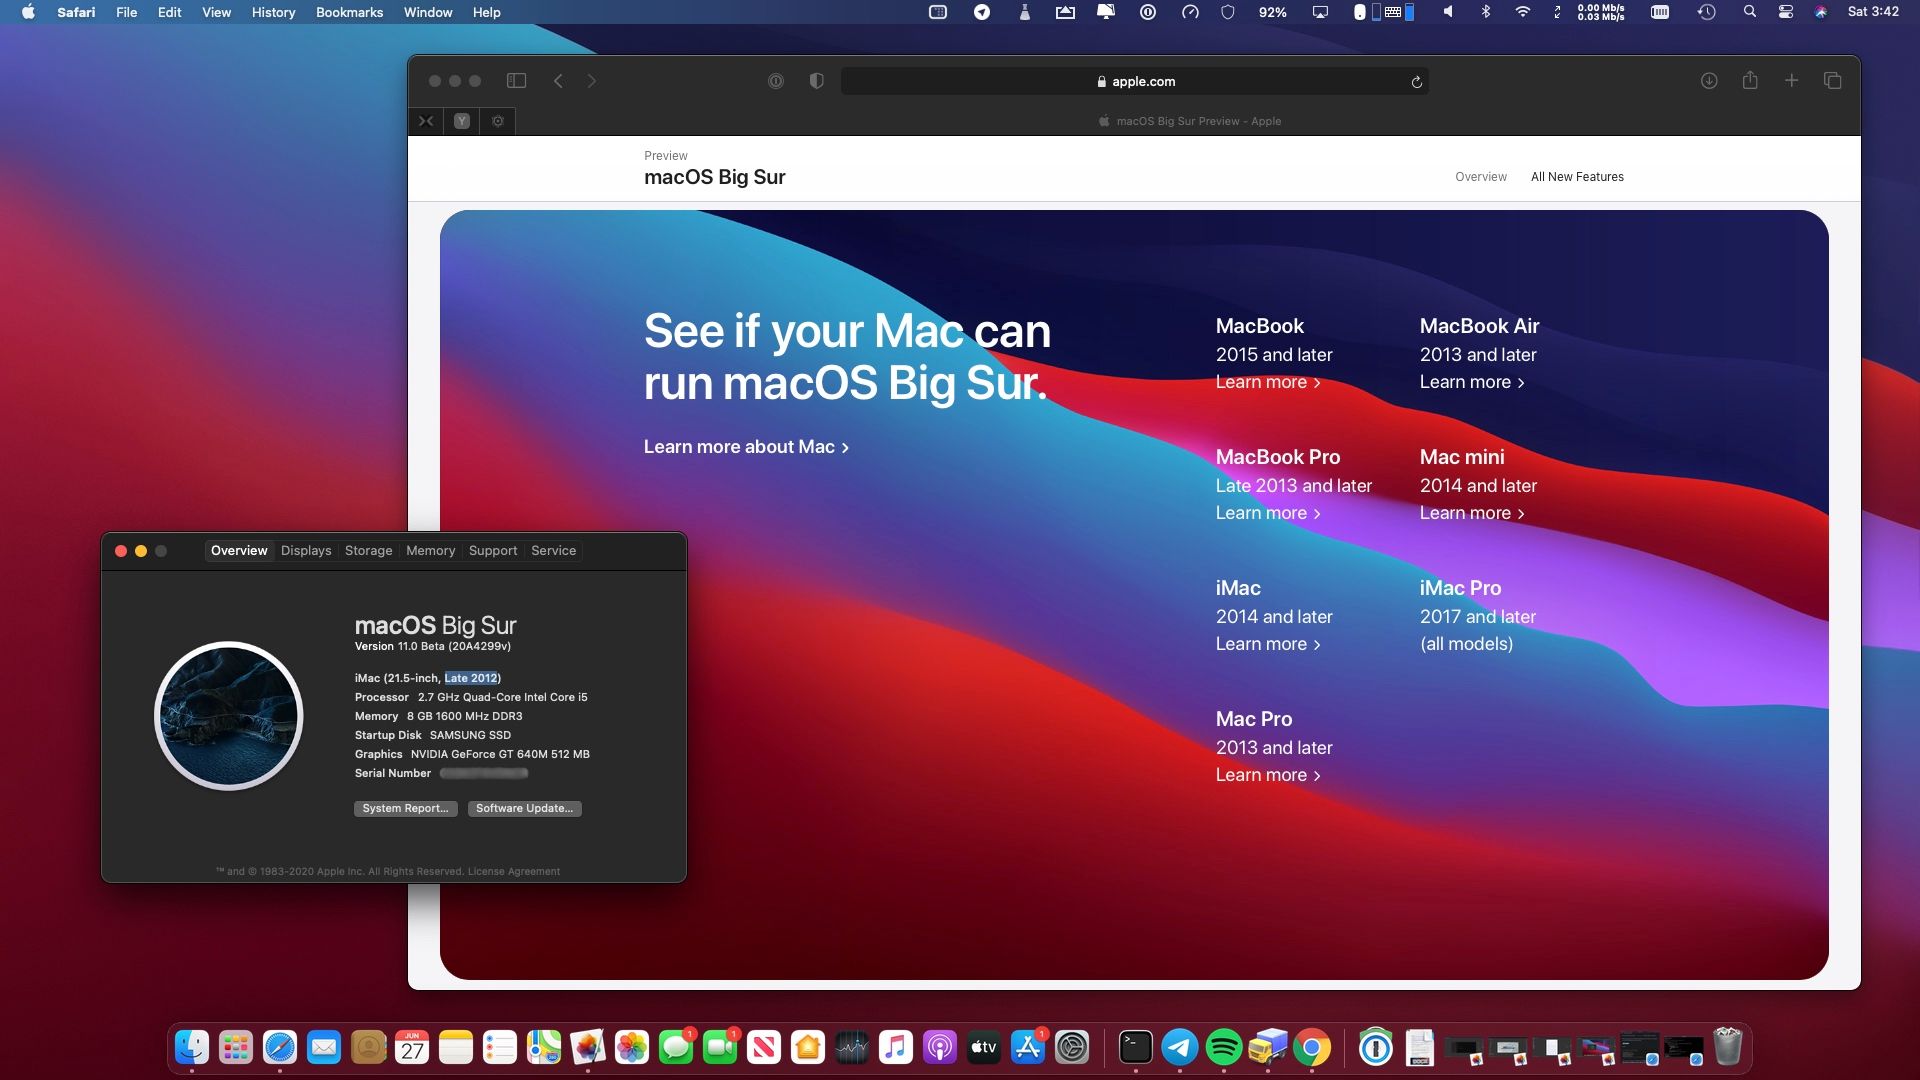
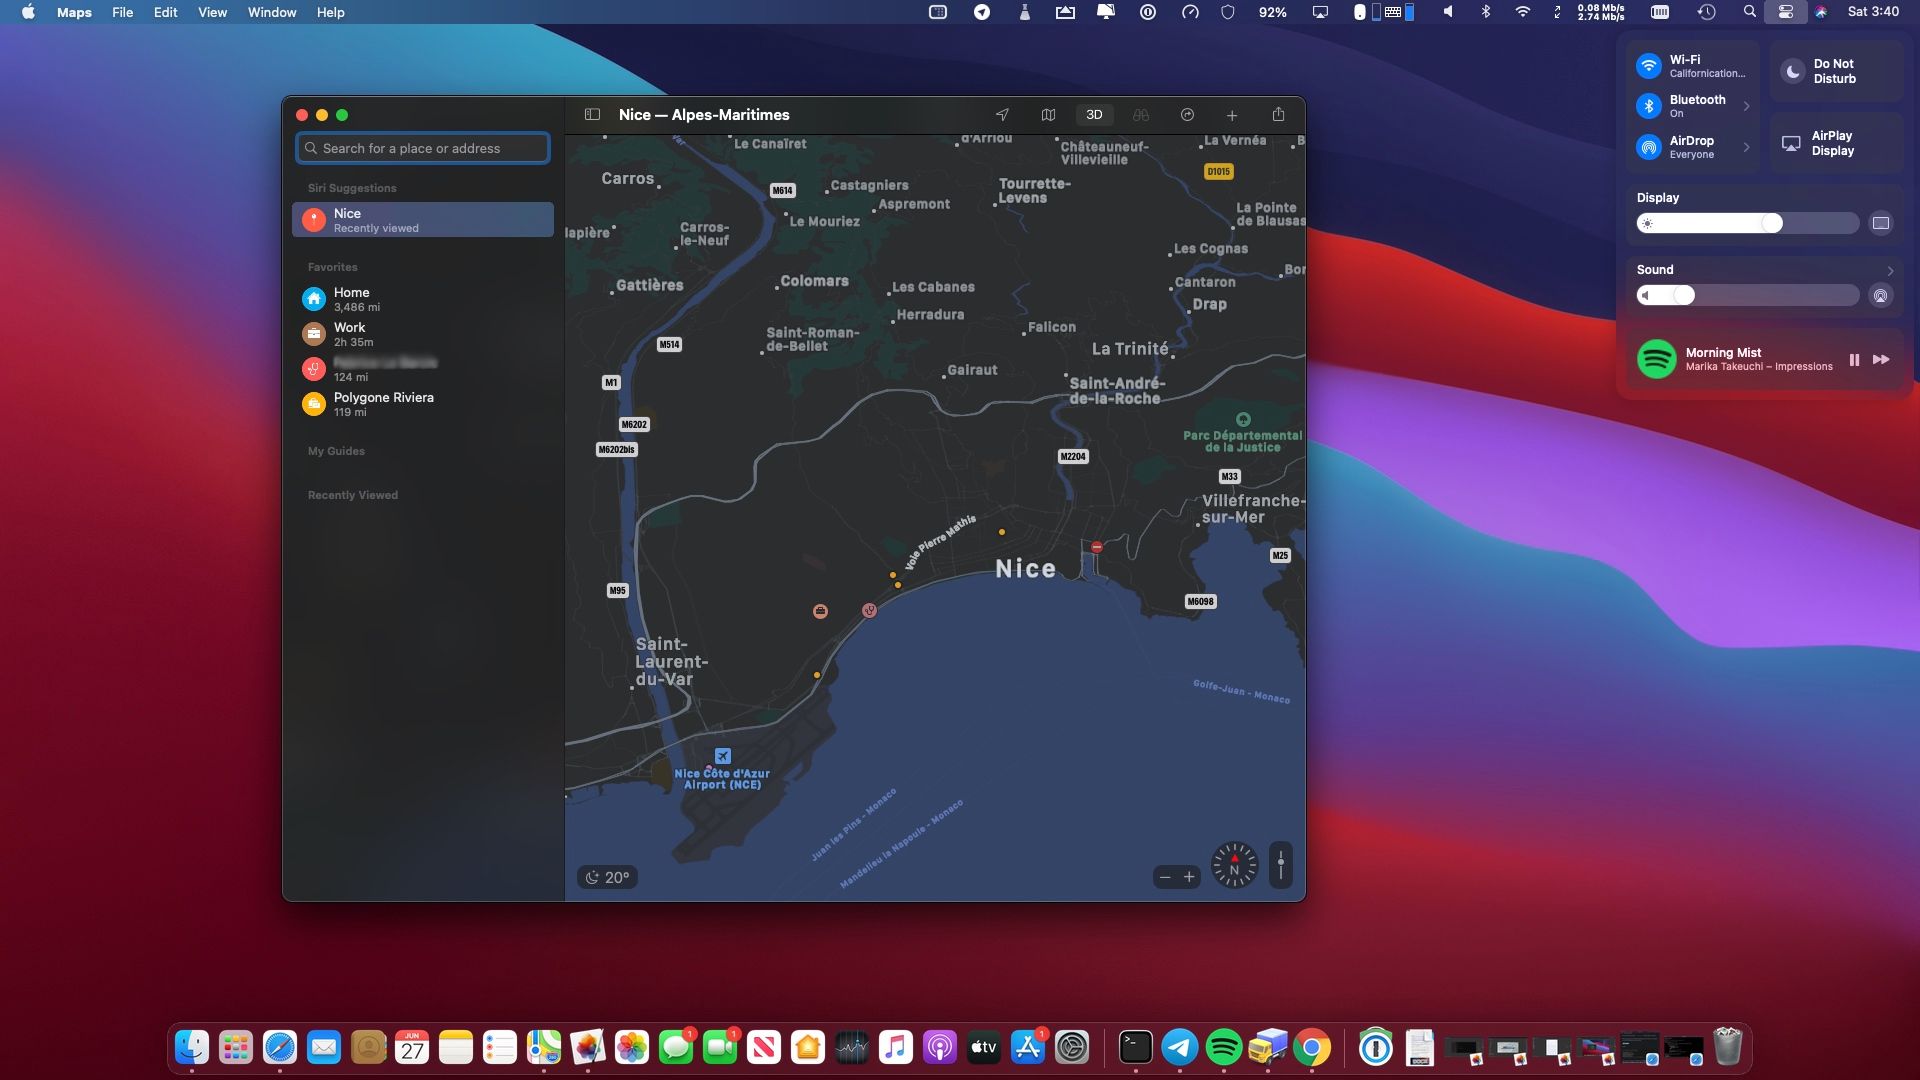
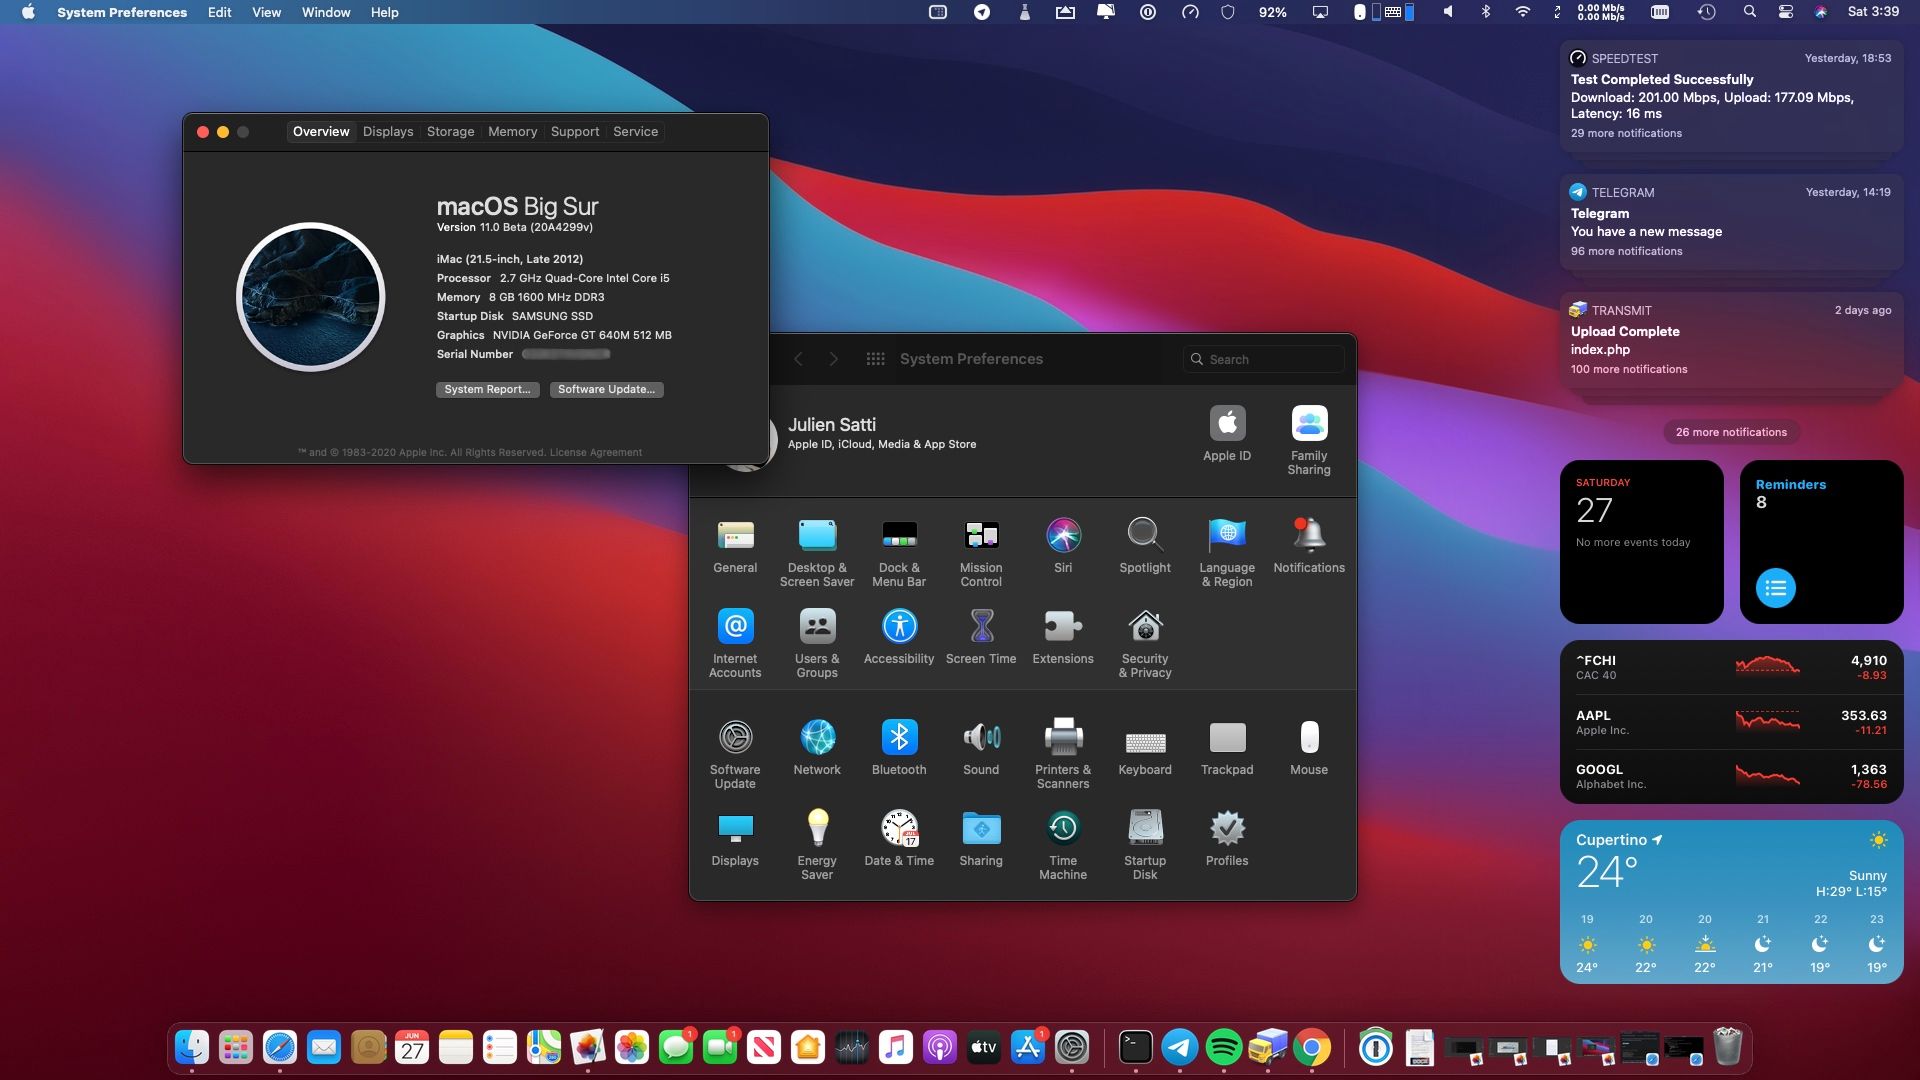
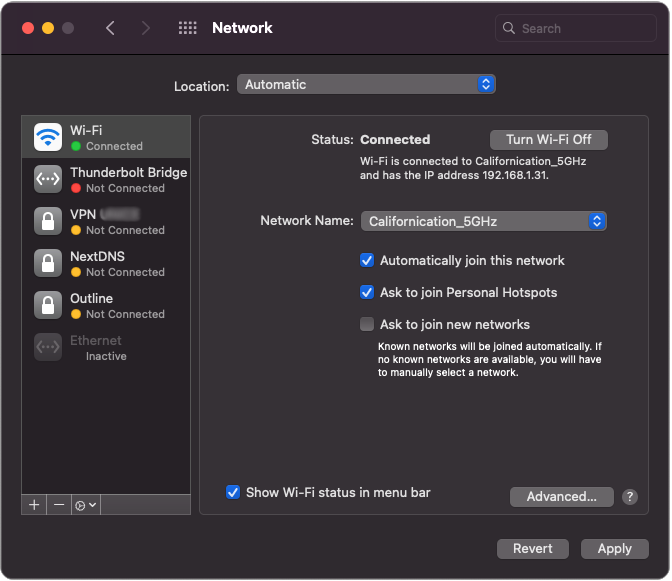
As you can see in the screenshots above, first, it's really late, and second, everything works like a charm. From Maps, a Catalyst version of an iPad app, to the new System Preferences... all is great, great is all! The revamped notification center and widgets section, as well as the new control center are also all there for us to enjoy... without having spent any more money on it.
Let's get right to it then!
The catch (and how to fix it)
Before we go, you should know that your mileage may vary depending on which device you are following this tutorial with. Indeed, while some of them will have everything working as expected, most of them will lack support for Wi-Fi on macOS Big Sur...
Not to worry, though. The Mac community and the wonderful people participating on the MacRumors forums have seen worse! This is nothing a little patching can't fix. I'd like to thank libneko, jackluke and Andrey Viktorov for their insightful contributions on how to fix the Wi-Fi and his experience. I wouldn't have macOS Big Sur and working Wi-Fi on my iMac if it wasn't for them and other members of this forum.
In such manner, you'd be happy to know that my iMac is ready to roll on the latest version for at least another update cycle — with all functions working properly. If you too, you are experiencing the failed with 66 error or want to fix you Wi-Fi on macOS Big Sur, make sure to jump to step 10 or follow the entire tutorial below.
Also, just a little reminder that this tutorial is intented for Macs that are currently running macOS Catalina (10.15).
November 17th: Since the official launch of macOS Big Sur, more people are trying to follow this tutorial that was previously meant for the beta version. Thanks to some of you who gave me feedback by email, you might have some more luck with the Micropatcher if the following tutorial fails... Stay safe everyone!
Tutorial : macOS Big Sur beta 1 installation and Wi-Fi fix via kernel extension modification
Edit July: now that beta 2 and 3 are out, this tutorial and some links might not work anymore. I'll try to update the article with the final release so your mileage may vary.
Step 0: being aware of the risks
If you are not comfortable with Linux or the Mac terminal, please do not attempt this tutorial. If you attempt this tutorial only to make your Wi-Fi working on your already working macOS Big Sur partition, do not do it also if you are not very comfortable with a Terminal as it may completely break your system. Wait for a better solution or buy a cheap Wi-Fi dongle on Amazon instead.
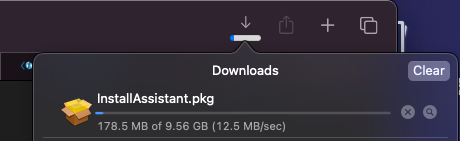
Step 1: downloading the beta
Since your Mac isn't officially supported, the update will not be showing on your system, even when enrolled in the beta program. You'll need to download the special package directly from Apple CDN, here (9.56GB).
Step 2: downloading the additional library
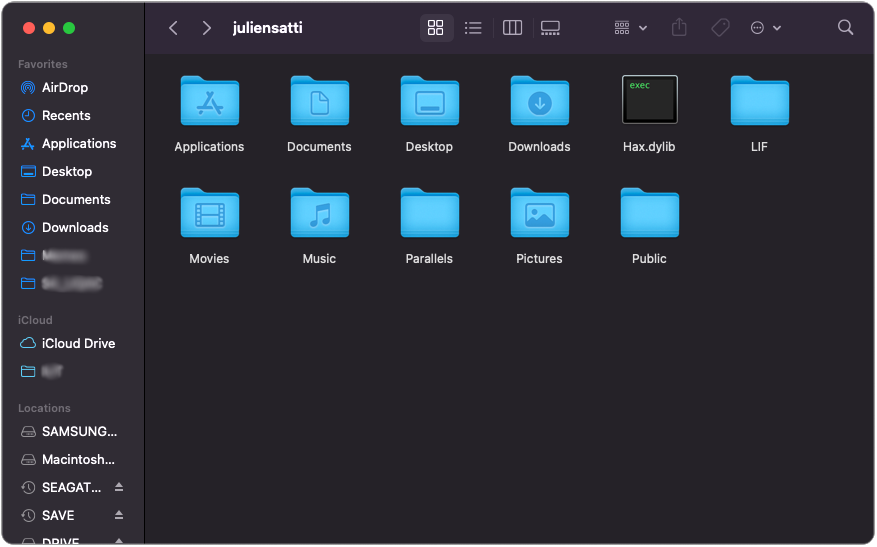
We need to inject an additional library named Hax.dylib during the installation process. You need to download it here (32KB).
Step 3: moving the library
To make it easier later (when we will use the $PWD variable in the Terminal), use the Finder to move or copy the library to your home folder. In my case this is /SAMSUNG SSD/Users/juliensatti/.
Step 4: booting into recovery mode
Before actually installing macOS Big Sur, we need to disable the system compatibility check layer, disable the system integrity protection (SIP), disable the verification of the libraries and, only then, insert our Hax.dylib in an environment variable.
To achieve all that, we first need to BOOT into recovery mode. Simply restart your Mac and immediately hold the CMD-R keys on reboot until you see the recovery OS.
Step 5: disabling SIP
Run csrutil disable in the recovery Terminal accessible in the menu bar under Utilities. You will also be able to check the success of the command, back in Catalina (so, after a reboot), by running csrutil status (optional).
Step 6: disabling compatibility check
Run the following command in the previoulsy opened Terminal in recovery mode: nvram boot-args="-no_compat_check". Nothing should show up if successful.
Step 7: disabling libraries validation
First, REBOOT your computer into recovery mode (step 4). Then, open a new Terminal from there and run this long command: sudo defaults write /Library/Preferences/com.apple.security.libraryvalidation.plist DisableLibraryValidation -bool true. If you get an error regarding sudo, try the same command without it.
Step 8: inserting the additional library
From the same Terminal, execute launchctl setenv DYLD_INSERT_LIBRARIES $PWD/Hax.dylib. This command will add the Hax.dylib library in your home folder as an environement variable.
Step 9: installing macOS, finally
To proceed with the proper installation of the system, REBOOT your computer in macOS Catalina (your original partition). Then, open the InstallAssistant.pkg package that you downloaded on step 1.
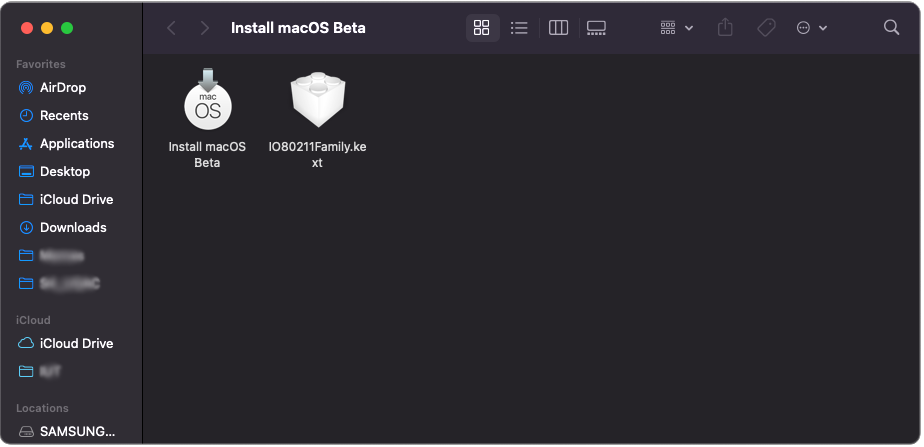
At the end of the process, a new app will be installed in your Applications folder (you can find it via Spotlight): Install macOS Beta.
IMPORTANT: If the computer on which you will be installing this version of macOS is not capable of a wired Ethernet connexion and if you do not have another computer on-hand, please also follow step 11 to 13 right now as you may not have a working Wi-Fi right away after the install.
The only thing left to do is to run this new application, select your target partition and wait
Please note that during the launch of the latter app it may seem stuck. It is not, the whole macOS Big Sur OS is being unzipped in the background, please wait. Additionnaly, you can check this by opening the Activity Monitor.
Once the OS is prepared to be installed, click "Restart" and you should be on for dozens of automatic reboots. Wait for the installation to proceed, give it time.Some time later, you should now have macOS Big Sur beta1 installed on your obsolete Mac. Congrats!
— At this point your Wi-Fi should or should not be working —
My Wi-Fi is working
Great! It's over. Glad I could help! Updates should be arriving in the system preferences, as usual. Don't forget to enroll your Mac to the beta program to receive future betas along the way...
My Wi-Fi is not working
Well then, we have work to do. Be sure to know what you are doing. If you are not but still feeling lucky (and totally aware that you can break your whole system in an instant), then proceed to the steps below:
Step 10: testing the system
In order to make your life easier, try to run the following command from a macOS Big Sur Terminal: sudo mount -uw. If no error is returned as a result, please follow this tutorial from ASentientBot or this one if it still does not work, from libneko. Else, carry on.
Step 11: downloading an older version of the Wi-Fi kernel extension
An older kext (kernel extension) named IO80211Family.kext is necessary in order for the Wi-Fi to work. You can download it here (8.6MB, 20.5MB unzipped).
Step 12: creating the bootable USB
You'll need a bootable version of macOS Big Sur on a USB stick (or an external drive partition, as you wish).
To do this, open a Terminal, make sur that Install macOS Beta is still in your Applications folder and execute the following command by making sure to replace <USB/ Label> with the name of your USB stick or dedicated partition:sudo /Applications/Install\ macOS\ Beta.app/Contents/Resources/createinstallmedia --volume /Volumes/<USB/ Label>/
Please note that this command will wipe the content on the volume selected.*
Step 13: copying the extension to the USB
Now that the bootable USB is done with the previous command, you can copy on it the IO80211Family.kext previously downloaded (and unzipped, if not already done).
Step 14: remembering Volume Group UUID and Preboot disk
From a Terminal window running on your installed macOS Big Sur system, run sudo kcditto. Take a picture with your phone of this window as it may come in handy later on.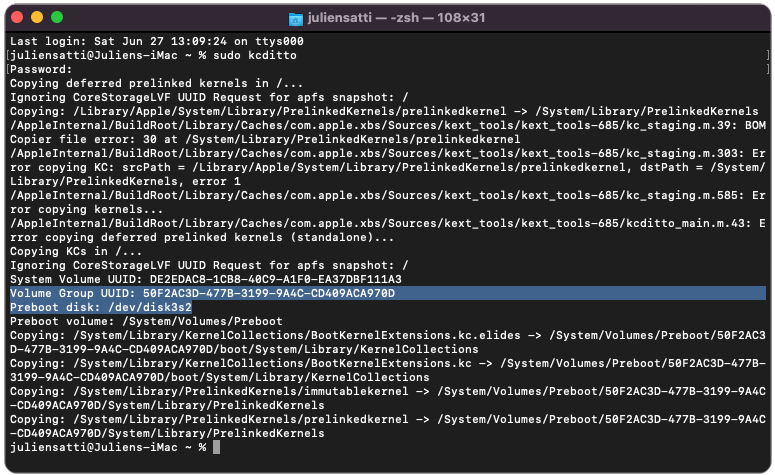
Step 15: disabling authenticated root
- REBOOT to the bootable USB drive of macOS Big Sur.
- If you have FileVault enabled, neither the author of the original tutorial or I have tested it, but you should be prompted to enter password for the Big Sur installation.
- Open a new Terminal window, from Utilities > Terminal.
- Run
csrutil authenticated-root disableto disable the authenticated root from the System Integrity Protection (SIP). - REBOOT to the bootable USB drive of macOS Big Sur, once more.
Step 16: mounting the volume
After reboot, open a new Terminal and:
- Mount your Big Sur system partition, not the data one:
diskutil mount /Volumes/<Volume\ Name. Please don't forget to replace<Volume\ Name>with the name of your volume. Always prepend spaces in volume name with, for example, in my case:diskutil mount /Volumes/SAMSUNG\ SSD - Remount it as readwrite:
mount -uw /Volumes/<Volume\ Name> - Make a snapshot to restore if something wents wrong:
/System/Library/Filesystems/apfs.fs/Contents/Resources/apfs_systemsnapshot -s "BeforeWifiKexts" -v /Volumes/<Volume\ Name>
You should see:
<Volume\ Name> on /Volumes/<Volume\ Name> mountedas a confirmation.
Step 17: replacing the kernel extension (kext)
From the same Terminal:
- Navigate to the extensions folder:
cd /Volumes/<Volume\ Name>/System/Library/Extension - Backup current kext:
mv IO80211Family.kext IO80211Family.kext.backup - Copy new kext from the USB drive, the latter always being mounted at /Volumes/Image\ Volume :
cp -r /Volumes/Image\ Volume/IO80211Family.kext ..
Make sure there are no errors at the end of these commands. Nothing should appear, it's normal.
Step 18: installing the kernel extension (kext)
That's where things can start to go wrong, proceed cautiously.
From the same Terminal, run the following command: kmutil install --update-all --volume-root /Volumes/<Volume\ Name>.
You should see
Brcm4360,Brcm4331and some other kexts in the output. There MUST be no errors when running this command. You can see an example here.
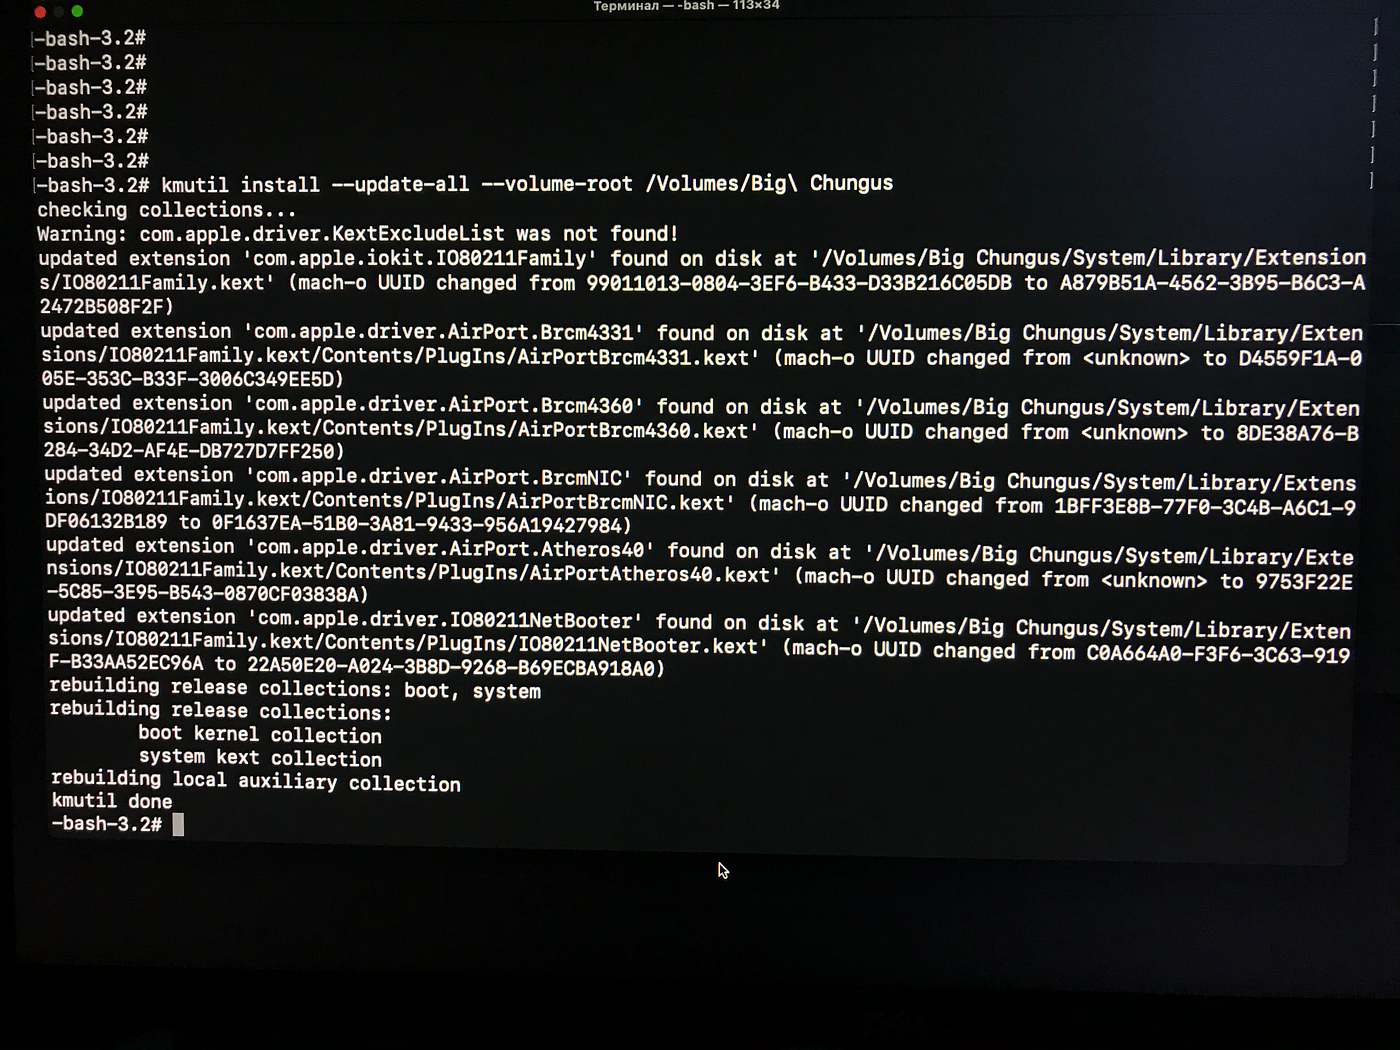
Step 19: creating snapshot and making it bootable
Frpm the same Terminal, once again:
- We need to create an APFS snapshot for our volume, running the following long command:
/System/Library/Filesystems/apfs.fs/Contents/Resources/apfs_systemsnapshot -s "WifiKexts" -v /Volumes/<Volume\ Name> - Then, we need to mark it as bootable:
/System/Library/Filesystems/apfs.fs/Contents/Resources/apfs_systemsnapshot -r "WifiKexts" -v /Volumes/<Volume\ Name>The only difference between these two commands, is-safter apfssystemsnapshot replaced with-r
You should see
Attempting creation...andAttempting tagging...if everything went perfectly.
Step 20: copying updated BootKernelExtensions to the Preboot volume
Well, that's where things went south for me while following a tutorial of my own. I was told to mount the Preboot partition of the disk on which my installed macOS Big Sur is. At Step 1, the Terminal told me this was /dev/disk2s2. However, while executing the right command to mount this partition, well... no partition with this name was available.
My fix was to run in the current Terminal of my USB Big Sur volume the following command in order to list all the disks (and their partitions) connected to Mac : diskutil list. From there, you should look over to a partition named Preboot and make sure it's the right one (if it's not the only one).So anyway, once that was under control:
- Mount the Preboot disk with
diskutil mount /dev/<yourprebootdisk>(once again, look at the picture you took on step 13, or do what I did above). - Create a backup of Preboot data by:
2.1. Navigating to the volume:cd /Volumes/Preboot;
2.2. Listing the UUID(s):ls;
2.3. Checking with your picture that this is the correct UUID and execute the following command by replacing<UUID>with your UUID:cp -r <UUID> <UUID>.beforewifikexts. - Navigate to the correct folder in Preboot with the UUID we just confirmed:
cd /Volumes/Preboot/<UUID>/boot/System/Library/KernelCollections - Copy BootKernelExtensions from your volume to Preboot:
cp /Volumes/<Volume\ Name>/System/Library/KernelCollections/BootKernelExtensions.kc .
cp /Volumes/<Volume\ Name>/System/Library/KernelCollections/BootKernelExtensions.kc.elides .
You should not see anything in return if the commands were successful.
We can also note that remembering the UUID wasn't really needed because in my case there were only one install base, but this way you can always verify...
Step 21: final
REBOOT to your installed macOS Big Sur system (the normal one). If you’re stuck on boot after approximately 10 minutes, well, you are in a state I wouldn't want to be in. THe only thing left to do is to reset your whole system via Recovery Mode... else:
- Log in (Wi-Fi still should not work, that's normal).
- Open a Terminal and run:
sudo kcditto - Reboot.
Congrats! Wi-Fi should now work correctly.
In case something went wrong
To revert our changes, in the case they haven't entirely broken the system, REBOOT into your mac OS Big Sur USB and open a Terminal:
- Make a backup snapshot bootable (notice
-rinstead of-s):/System/Library/Filesystems/apfs.fs/Contents/Resources/apfs_systemsnapshot -r "BeforeWifiKexts" -v /Volumes/<Volume\ Name> - Mount Preboot as listed in step 19:
cd /Volumes/Preboot - mv
.broken where is your Volume Group UUID4. cp -r .beforewifikexts where is your Volume Group UUID - REBOOT to your macOS Big Sur original system and check. After that, you can try again, but don’t create BeforeWifiKexts snapshot and don’t copy preboot again! It’s meant to be done once.
· · ·
That's the end of this large tutorial. Thanks again to all the contributors on MacRumors forums for their help... and long live to our Macs! I'll try to update this tutorial to see if the other betas break what we fixed with the Wi-Fi or not. Until then, thank you for passing by! 🤟🏼
If you tried for yourself or liked this post, don't hesitate to share this article with people it might interest and please share your taughts below in the comments. 😄